How to Clip Dog Nails
Trimming dog nails can be a little intimidating, especially if your dog has black nails. Here are some tips to help your manicures and pedicures (pet-icure?) go as smoothly as possible!
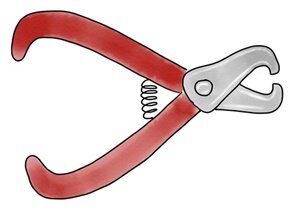
Clippers: It’s important to use a dog nail trimmer; human nail trimmers won’t cut it! The ‘scissor’ style trimmers are the easiest to use and see where you are cutting.
Styptic powder: Styptic powder is used to stop bleeding in case we cut a quick by accident. You can also use corn starch. It’s a good idea to have one of these on hand just in case, because a quick can bleed quite a lot!
A ‘scissors’ style nail trimmer is the easiest to use because you can tell exactly where you are cutting!
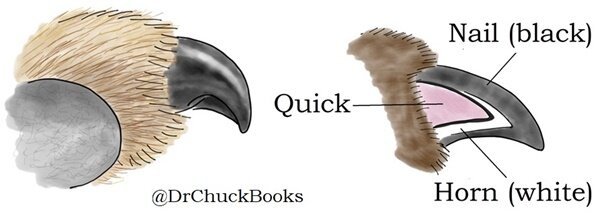
Black nails are tricky!
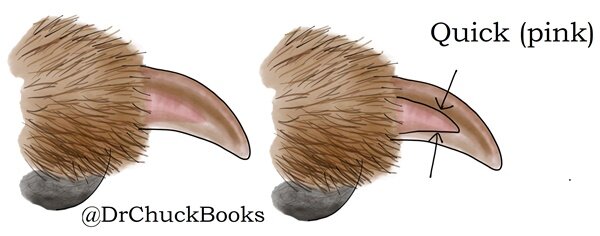
The Nail: The structure of a dog nail is similar to cats and people, a small quick sits underneath the nail, and the nail grows outward. If your dog has some clear nails, you can see the quick as a pointy pink triangle. Our goal is to cut the nail without cutting the quick! But unlike people and cats, dogs can have black nails that make the quick impossible to see until you start cutting. The quick will grow longer if the nails are not trimmed regularly, but will shrink back over time once the nails are cut.
Even in clear dog nails it can be hard to spot the quick!
Before we start: We can only trim our dog’s nails if our dog allows us to touch their feet! It is best to start playing with a puppy’s feet when they are very young, to get them used to the idea. For older dogs, start by just lightly touching their feet. Teaching your dog how to ‘shake’ can be a helpful tool! It’s important to go slow with training and use lots of positive reinforcement (praise and treats) and make paw-touching sessions short and fun. Once we can safely hold our dog’s feet we can start trimming nails. Along with getting used to having their paws touched, some dogs need to get used to seeing a nail clipper. Keeping the nail trimmer out and playing with the nail trimmer when you are not giving a nail trim can help desensitize your dog to the presence of the nail trimmer. Giving your dog treats whenever you grab the nail trimmer can help condition them to associate the nail trimmer with a positive reward! For some dogs, we will need to work on tapping the nail with the nail trimmer before actually cutting. If your dog is not particularly fond of nail trims, only trim a couple nails at a time. We want our dog to enjoy the process and allow us to continue trimming nails in the future. It’s better to do just a few nails at a time and keep our dog happy, than to force them through a full nail trim all at once and have them run away whenever they see the nail trimmer! If your dog is stressed do NOT proceed with the nail trim; keep working on desensitization so they can have a positive experience!
It’s important to take just a little bit at a time so you don’t hit the quick!
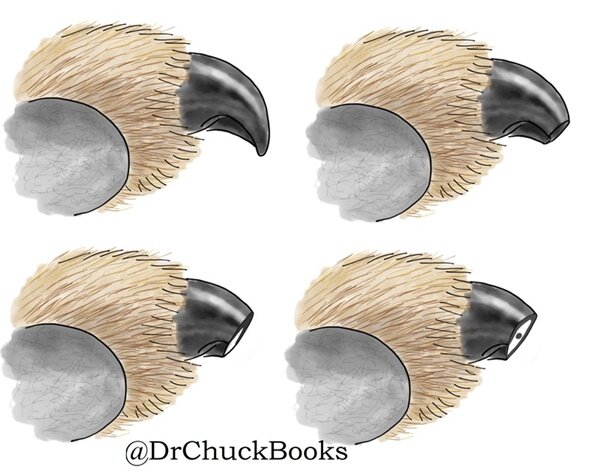
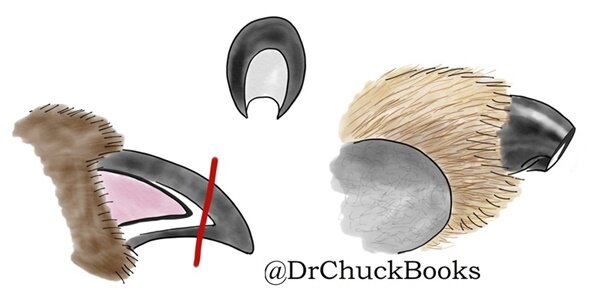
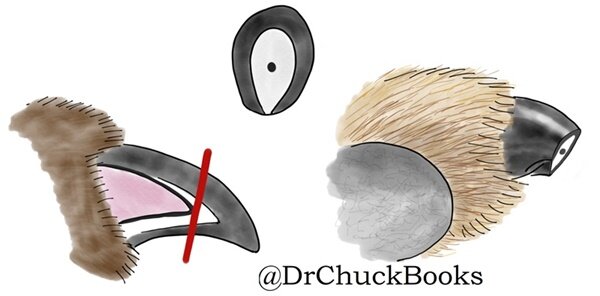
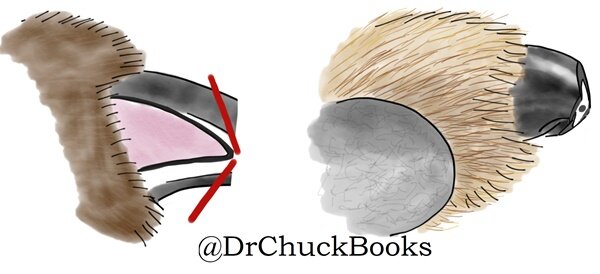
Cutting: For clear nails, you can cut a few millimetres ahead of the quick. If your dog has clear and black nails, the clear nails can give you a rough guide to where the quick likely ends in the black nails. For black nails where you cannot see the quick, always start by taking a very small amount of nail at a time. The structure of the nail is a hard outer sheath that covers a softer, flakier white interior (horn). The outer sheath grows out farther than the horn. As you cut back the nail, you will see this horn material start to appear in cross-section as a white circle under the black nail. Once you cut far enough back, the quick will appear as a small black dot in the center of the white horn. Once you see the quick, stop cutting! Once you are comfortable trimming nails you can try also making angled cuts to smooth the top and bottom of the nail. And don’t forget the dewclaw! (the ‘thumbs’ on the front (and sometimes back) paws).
Only cut into the outer nail; you can keep going!
The white horn is now visible, better slow down so you don’t hit the quick!
You can see the quick as a little dot in the center! Time to stop cutting!
You’re all done! Congratulations! But if you are feeling ambitious, and your dog is enjoying the nail trim, you can also try to smooth out the fresh cut with two more cuts above and below the quick!
Cutting back a little helps keep the freshly cut nails from being too sharp!
